Experiment: Can plants stop soil erosion?
Soil erosion washes pollutants into streams and rivers and causes farmland loss
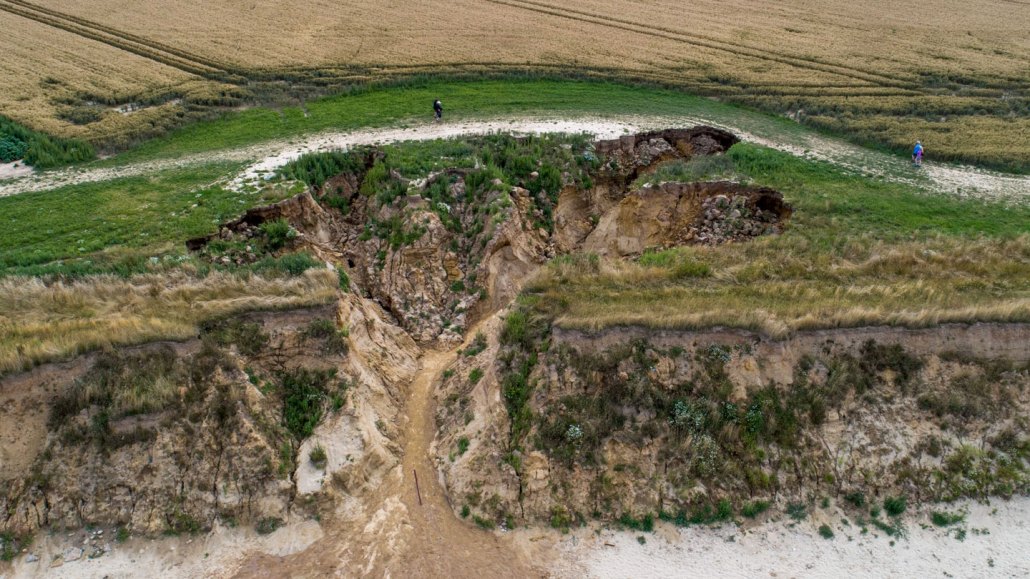
Soil erosion can lead to landslides, like this one on a beach in England.
Bloomberg Creative/Bloomberg Creative Photos/Getty Images Plus
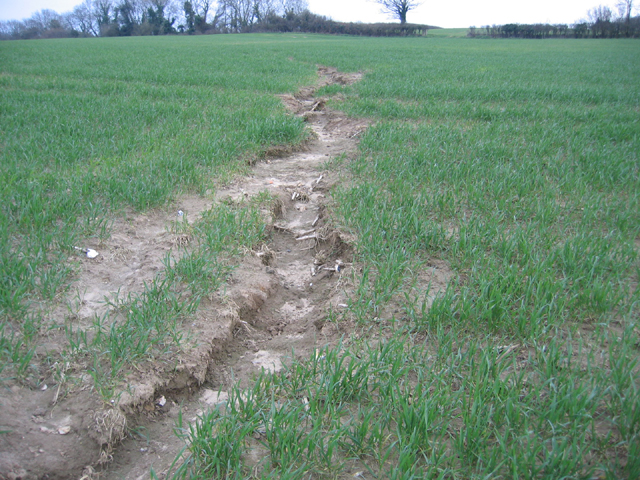
You are surrounded by soil every time you step outside. It seems like the world has plenty of it, so why would we need to worry about conserving it? It turns out that soil erosion, or the washing away of soil by forces like wind and water, is actually a big problem. It can cause loss of farmland as soil in fields washes away, as seen in Figure 1. It can pollute waterways by washing pesticides and fertilizers into them. It can even cause damage to human life and property by contributing to mudslides and landslides.
So, soil erosion is definitely a problem. How can you help solve it?
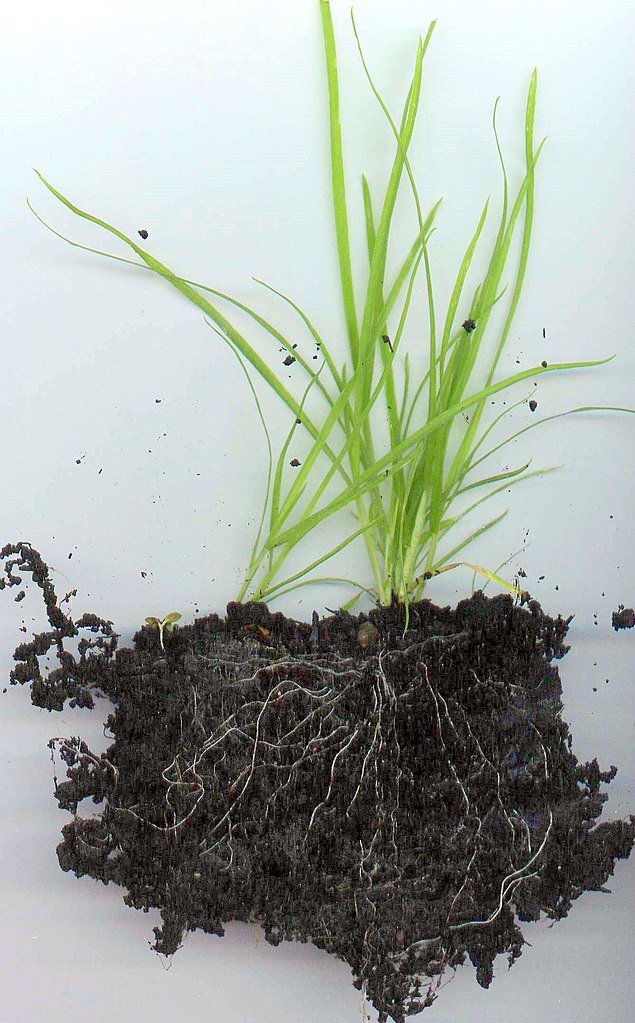
Soil erosion is partially caused by runoff, or water that flows over the surface of the ground after the soil is saturated, or unable to absorb any more water. One way to help combat soil erosion is through the use of plants. Plants have extensive root systems that can help “grab on” to soil and keep the soil clumped together. You can see this if you have ever pulled a plant out of the ground, like the clump of grass in Figure 2. Plants also absorb some of the water in the soil. These effects make it harder for water to wash away the soil. (Note that plants can also help block wind and therefore prevent wind erosion, but this project will test water erosion only.)
In this project, you will set up a controlled experiment with “hillsides” made from small trays filled with dirt. Some of the trays will have seeds planted in them, and some will not. Once the plants are grown, you will simulate rain with a watering can. Do you think plants will help stop or reduce soil erosion? If so, by how much? Try this project to find out!
Terms and Concepts
- Soil erosion
- Runoff
- Saturated
- Economic botany
Questions
- What are some of the causes of soil erosion?
- What are the different types of soil erosion?
- What are some of the economic impacts and costs of soil erosion?
- What are some methods to prevent soil erosion?
Materials and Equipment
- Six aluminum bread pans, about 20×7.5×7.5 centimeters (8×3×3 inches)
- Two aluminum cake pans, about 30×20×2.5 centimeters (12×8×1 inches)
- Soil (enough to fill all six bread pans)
- You can purchase potting soil from a hardware store or garden center.
- If the soil in your area is good for growing a vegetable garden, you can just use dirt from outside.
- Radish seeds (1 small bag); available at a hardware store or garden center
- Ruler, metric
- Sticky notes
- Permanent marker
- Scissors or sharp knife
- Full-size watering can with “rain” spout (versus a single-hole spout); available at a hardware store or garden center
- Sunny windowsill for the plants or, if the weather in your area is appropriate, you can put the plants outside
- Short plastic container, or other object that can be used to prop up one edge of a bread pan to a height of roughly 3-5 centimeters (1-2 inches). Do not use an object that you do not want to get wet, like a book.
- Outdoor test area with a flat, level surface. If you must do the project inside, set up and perform your trials in a bathtub or other place where it will be easy to clean up spilled water and a little dirt.
- Optional: Stopwatch
- Kitchen scale
- Lab notebook
Experimental Procedure
Preparing Your Plants
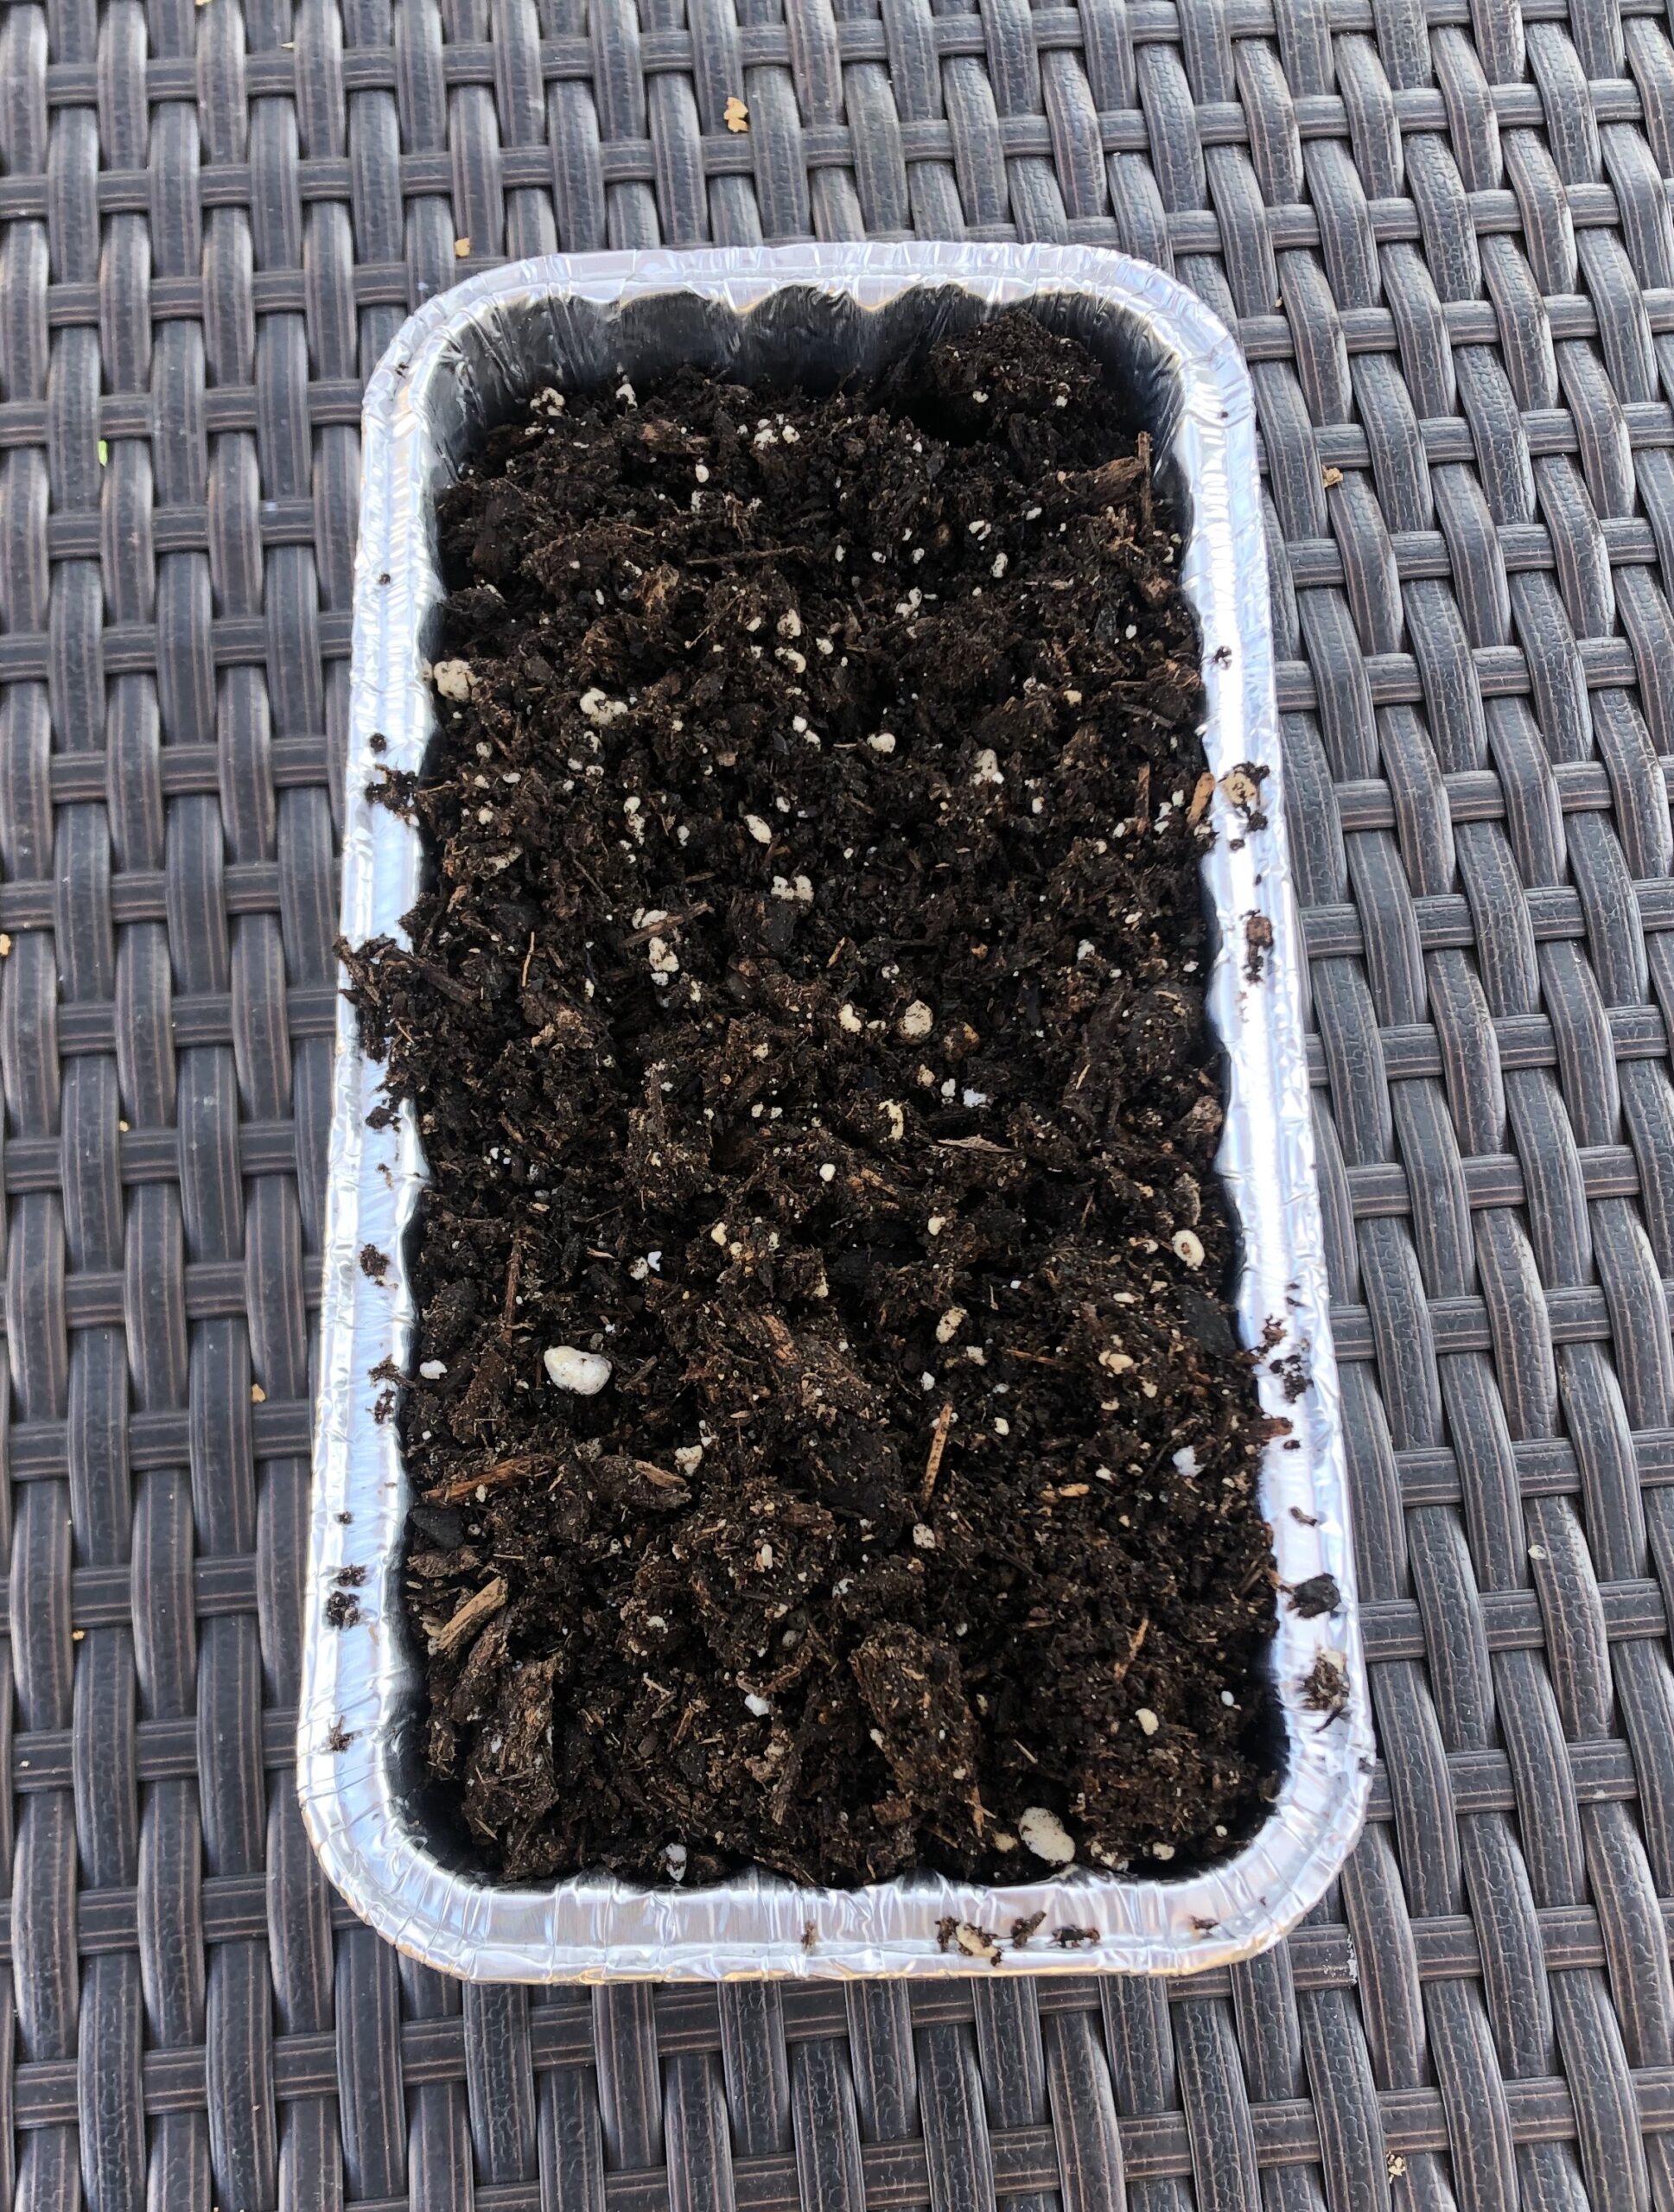
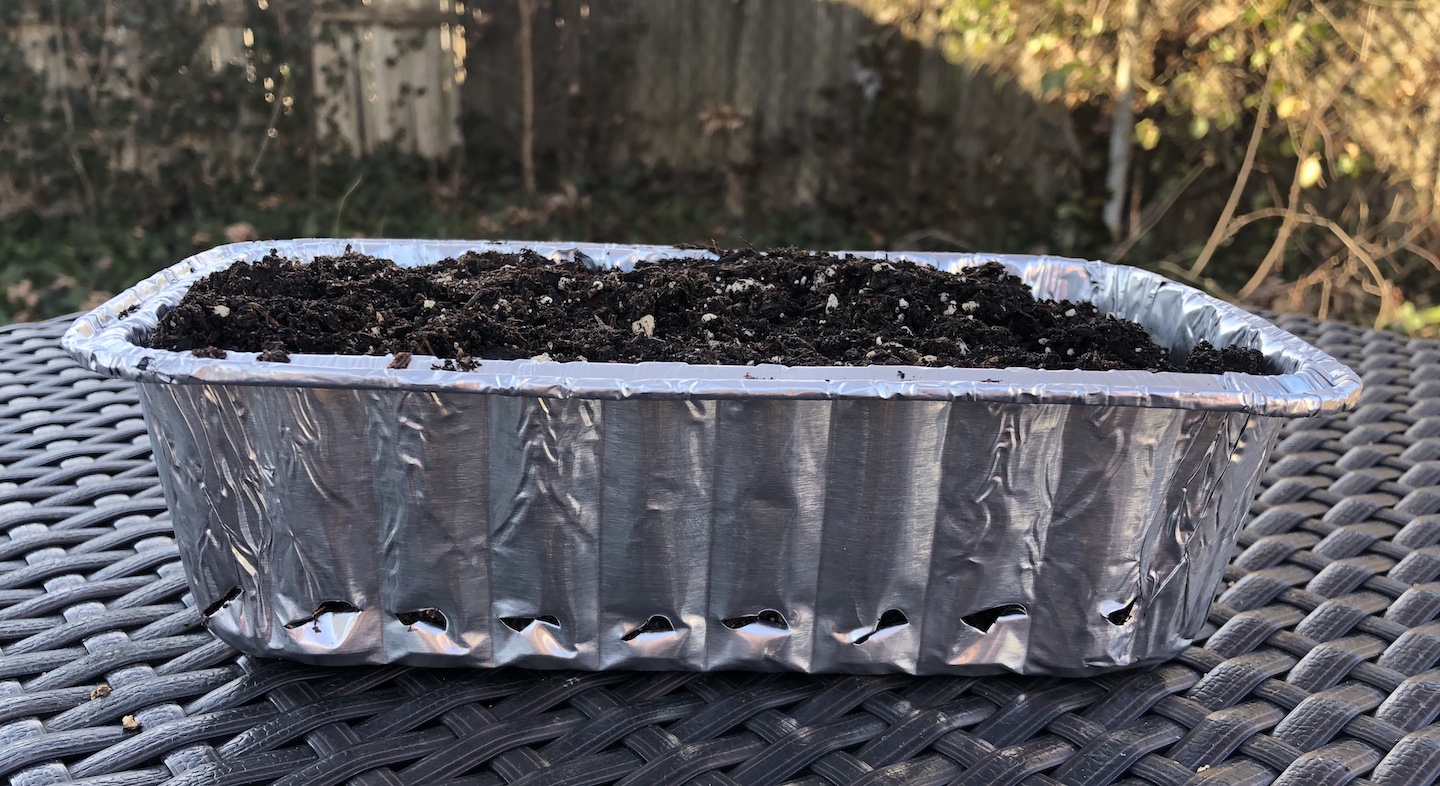
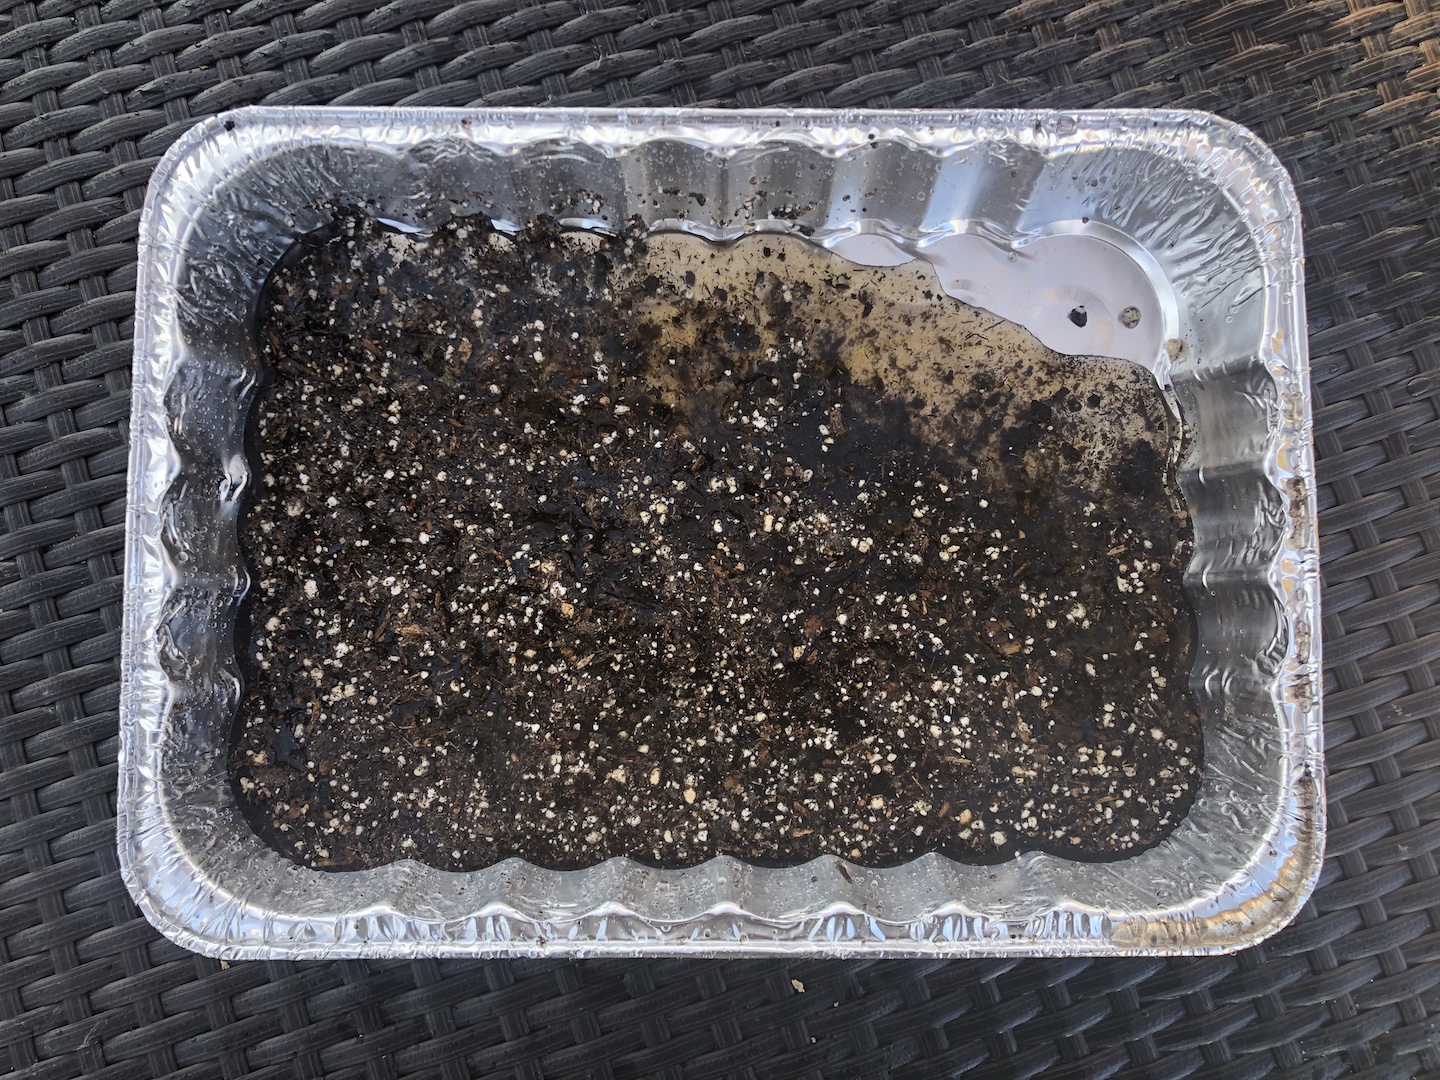
1. Fill each of the six bread pans with soil, as shown in Figure 3. Leave a little bit of space at the top, so the soil is not flowing over the edges.
2. Plant radish seeds in three of the bread pans, slightly closer together than the package directions say to. For example, if the package says to plant the seeds 1 inch apart, you could plant them 0.5 inch apart. You can do this because you do not need the radish plants to be full-grown for this project. Putting them closer together will allow you to more clearly see the effects of plant roots on the soil.
3. Use sticky notes to label each of your bread pans with a trial number and indicating whether or not the pan has seeds, as shown in Figure 4. You should have three bread pans with seeds and three without seeds, for a total of six.

4. Use scissors or a sharp knife to puncture holes along the bottom edge of the bread pans, as shown in Figure 5. These will serve as drainage holes to allow excess water to drain out of the pans.
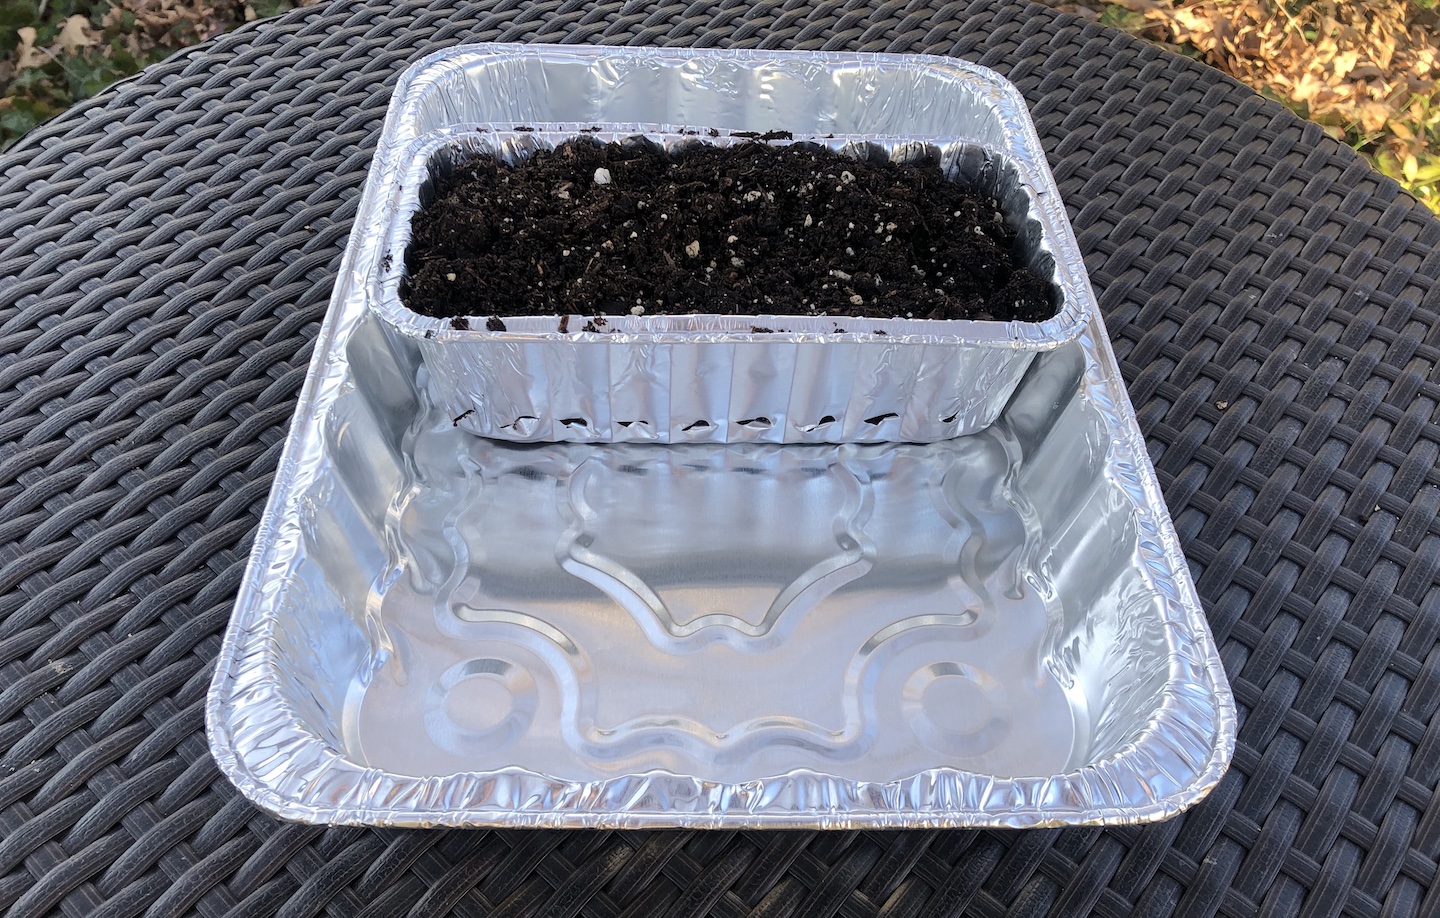
5. Place the bread pans into the cake pans, as shown in Figure 6. This will allow the cake pans to collect any excess water that leaks out of the drain holes in the bread pans. You should be able to fit three bread pans into each cake pan: use one cake pan for your bread pans with seeds and one cake pan for the pans without seeds.
6. Place both cake pans near a sunny window (or outdoors, if the weather in your area is appropriate). Make sure the plants will receive as much direct sunlight as possible during the day. Ask an adult if you are not sure about putting the plants outside. If the weather is not right (if it is too hot and dry, or too wet and rainy) the plants might die, and you will have to start over.
7. For about 7-10 days, water the soil in the bread pans gently once per day. Once your plants are roughly 8-10 centimeters (3-4 inches) tall, you are ready to move on to the next section and conduct your experiment. How many days this takes may vary based on factors like temperature, exposure to sunlight, how much you water the plants, and the type of soil you used.
- Water them gently so the force of the water pouring on the dirt does not push the seeds around. You will have to use your judgment when watering the plants. You want the soil to be wet, but not flooded. If water starts to collect in the cake pans, this means you may be overwatering. Drain the cake pans and reduce the amount of water you apply.
- Make sure you water the bread pans with seeds and the bread pans without seeds. This will ensure that your experimental control (the bread pans without seeds) received the same amount of water throughout the experiment as the bread pans with seeds. This also simulates real-world rainfall conditions (a hill without plants would receive the same amount of rainfall as a hill with plants).
Testing Soil Erosion
1. Record Table 1 in your lab notebook so you can use it to write down your results.
| Soil Type | Trial 1 | Trial 2 | Trial 3 | Average |
| Seeds | ||||
| No seeds |
2. Use your kitchen scale to record the mass of an empty cake pan, and write this value in your lab notebook. You will need it later.
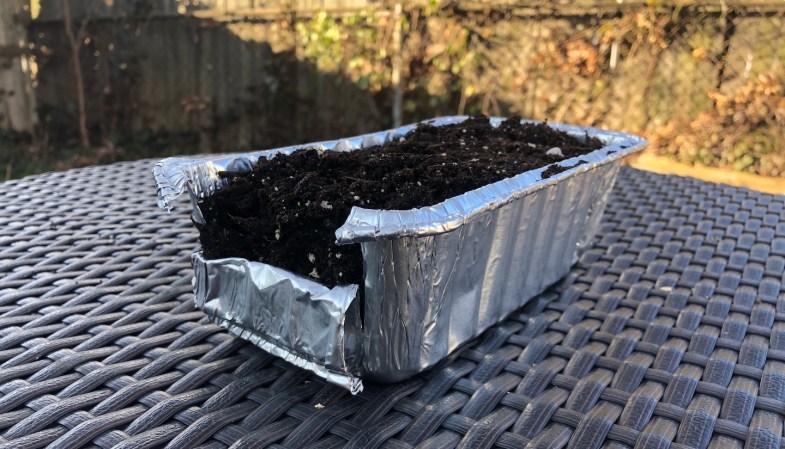
3. Make two vertical cuts halfway down the short side of each bread pan, then fold down the top half of that side to expose the soil, as shown in Figure 7. This will allow soil to flow out of the pan for your erosion test.
4. Set up your test area.
- Empty and dry out the cake pans, if necessary.
- Place a shallow plastic container that is roughly 3-5 centimeters (1-2 inches) high — or use another object of similar height that can get wet and dirty — next to one of the cake pans.
- Place the cut end of a bread pan into the cake pan, with the other end propped up on the plastic container, as shown in Figure 8. Only the uncut end of your bread pan should be on the box. Putting your bread pan at an angle like this simulates a hill.

5. Fill up your watering can. It is important to have the same amount of water in the watering can at the start of each trial.
6. Use the watering can to simulate “rain” on the bread pan by carefully following these steps:
- Hold the watering can up high enough that you can pour water onto the entire bread pan at once, as shown in Figure 9. This simulates even rainfall across the entire area. Note that this will result in some water landing outside of the pans, which is why you need to do the experiment outside or in a bathtub.
- Do not hold the watering can too close to the bread pan so the water only hits a concentrated area, as shown in Figure 10. You want to make sure the water hits the entire bread pan at once.
- Count to five slowly while pouring water onto the bread pan. Optionally, you can have a volunteer use a stopwatch to time you.
- Pay close attention to how much you tilt the watering can, and how hard the water falls on the bread pan. You will need to use the exact same method for each of your trials.

7. Carefully lift the bread pan up, being careful not to spill out any additional dirt into the cake pan, and set it aside.
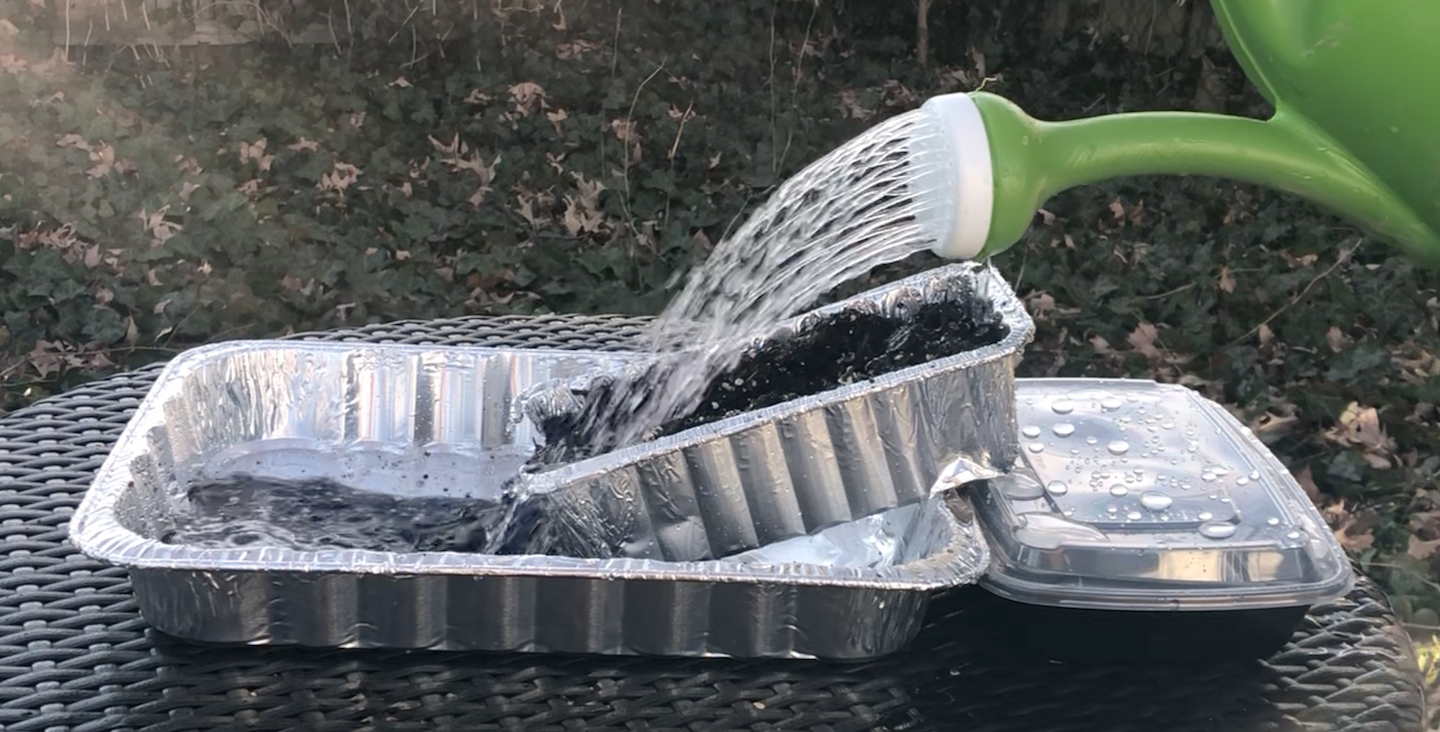
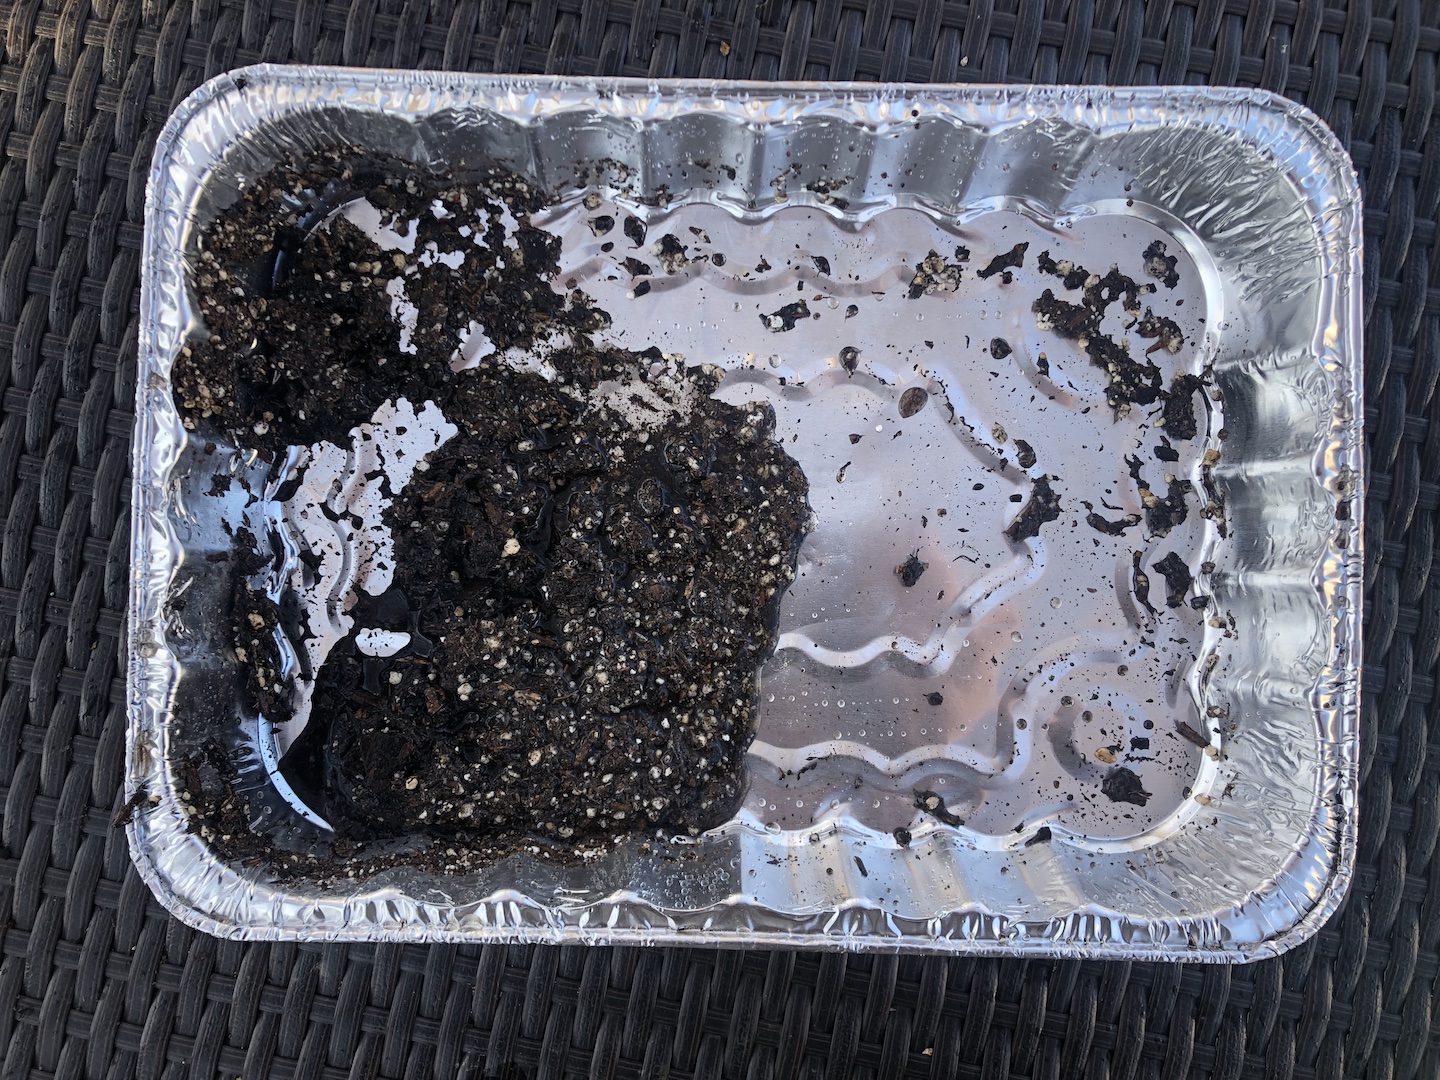
8. After the test, you should be left with a cake pan filled with soil and water, as shown in Figure 11.
9. Carefully drain the water out of the cake pan, without spilling any of the soil, so you are left with only the soil in the pan, as shown in Figure 12. This is the soil that was eroded from your “hillside” (the bread pan) by “rain” from your watering can. Note that a small amount of soil suspended in the water may also drain out of the pan, but it should be a small enough amount that it does not impact your results.
10. Use your kitchen scale to measure the mass of the cake pan and soil. Subtract the mass of an empty cake pan (which you should have measured earlier) from the combined mass of the soil and pan, to calculate the mass of the soil alone. Enter this value in your data table.
11. Repeat steps 4–10 for each of your remaining bread pans. Be sure to simulate rain for each pan as consistently as possible. Refill your watering can each time, even if you do not empty it all the way. This will allow you to apply consistent water flow for each trial.
Analyzing Your Results
1. Calculate an average value of the mass of the eroded soil for the pans with seeds and the pans with no seeds. Record the averages in your data table.
2. Make a bar graph of your results, with the type of pan (seeds or no seeds) on the X-axis (horizontal line), and the average mass of eroded soil on the Y-axis (vertical line).
3. Looking at your data, would you conclude that plants helped reduce the amount of eroded soil due to rain?
4. How do you think plants can be used to help reduce erosion in the real world? How do you think real-world situations might be similar to, or different from, your experiment?
Variations
- Try the experiment with different types of plants, or let the radish seeds grow for longer. Are some plants better at reducing soil erosion than others?
- Try the experiment with different types of soil. Are some types of soil more susceptible to erosion than others?
- Try the experiment with mushrooms instead of plants. Can mushrooms help reduce soil erosion?
- Do a larger-scale version of the experiment using larger containers, like plastic storage bins.
- If possible, try doing the experiment outside on an actual hillside. You may need garden tools and help from an adult to do this. Clear any existing vegetation (like grass) from two equally sized patches of soil on a hillside. Leave one patch of bare dirt, and plant seeds in the other patch. Figure out a way to measure soil erosion; for example, by digging holes downhill from each patch of soil and placing a bucket or large bin in the hole to catch the eroded soil.
- Use a video camera to record your experiments. Look up the different types of soil erosion due to water (sheet, rill, gully and splash — see the references in the Citations section). What type of erosion do you see during your experiment?
- Do your results change depending on whether the soil is dry at the beginning of your experiment, or if it is already saturated?
This activity is brought to you in partnership with Science Buddies. Find the original activity on the Science Buddies website.


