Building a DIY microscope
You can make a microscope for $10 with some wood, Plexiglas, a drill and your cell phone. Or at least, you can try
This is a story of what happens when a foolish scientist screws stuff up. It’s the story of a DIY microscope, and how it all went terribly wrong.
 |
I tried. I really did. I read the instructions through five times. I puzzled them out. I still bought the wrong items, broke stuff and messed things up. In the end, we still got something that worked. It didn’t work well. But it did work! And it forced me to do a lot of what you really do in science: You spend a lot of time just trying to get your equipment to work. But when you do, it’s all worth it.
Last week I came across the instructions to make a do-it-yourself microscope. For only $10! I had to try it.
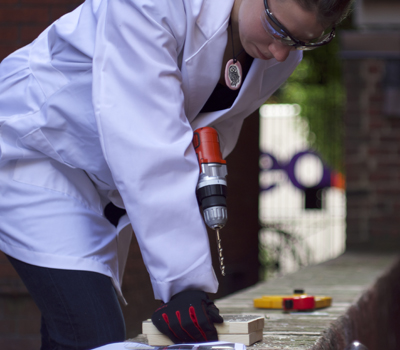
I went out and got all the parts I would need. I got some help in the form of Greg Sprouse, our awesome IT guy. And of course, I got all the proper personal protective equipment.
Here’s the idea for the microscope, invented by Kenji Yoshino, a Science Learning Center post-baccalaureate fellow at Grinnell College. You have a wooden base with screw sticking up from it. On those screws, you have a small stage for your samples. Above that you have a larger stage with your lens, taken from a laser pointer, to magnify what you want to look at. You rest your cell phone on the larger stage. The whole thing will look like Figure 2.

But mine came out looking very different indeed. The devil is in the details.
We started by trying to drill the wood and the Plexiglas to fit the screws in and make a base and a stage for the microscope. The instructions said you could drill them all through at once. It didn’t work out that way. Be careful with the Plexiglas! The recommended thickness on the instructions was 0.125 inches. They didn’t have that at Home Depot. I had the option of 0.22 inches or 0.009 inches. I went with 0.009.
Bad choice. The thinner it is, the quicker it breaks. After a little trial and error, we figured out that you can use masking tape over where you want to drill to distribute some of the force, protecting the Plexiglas. You can also heat the tip of the drill bit to make it go through the plastic easier. If you are a student doing this, make sure you have an adult help you!
But even if you use masking tape or heat, you have to start with a very small drill bit, and then use larger and larger bits until you get a hole that is the right size. This took a long time. When I talked to Yoshino about my issues, he noted to “always go with the thicker Plexiglas,” and mentioned that you can always ask your local hardware store if they have any extra scraps lying around of the right thickness. You may not need to cut it, and you may get a discount.
Despite the cracks, in the end we got the holes! And we weren’t going to let some cracks hold us back. The next step was embedding the lens.
 |
And here’s where I made a BIG mistake. From the instructions, it’s very hard to tell (on a printout) which piece of Plexiglas holds the lens. Even in the final photos, it’s hard to tell where the lens IS in the finished microscope, usually because the cell phone is positioned over it.
So I put the lens in the smaller piece. Wrong. That’s supposed to be the stage, where you put your samples. Oops. We were able to solve this by using the larger piece of Plexiglas lower as the stage for samples. It’s usually supposed to hold the phone at the top. But the smaller piece, where I accidentally put the lens, still held up the phone all right! All was not lost!
The real issue was the laser pointer and the lens itself. At first I could only find an expensive laser pointer. And when your laser pointer is expensive, the lens is fully embedded in the pointer and doesn’t come out. Oops. As Yoshino mentioned when I asked, a trip to a pet store will solve your problem, the cheap laser pointers are great for playing with cats!
However, if you do have a cheap laser pointer lens, you might also have a problem with focus. This lens never did focus properly and we ended up getting the best pictures without it. According to the comments on the instructions, we were not the only ones with this problem. You often have to have your sample VERY close to your lens, and different brands of laser pointers will get you different results.
Finally, we put in the light. Or we tried to. The instructions call for an LED light. I was unable to find the one pictured, so I used a headlamp I already had. Bad choice. The headlamp emits light at a frequency that picked up by the cell phone, producing a strobe effect!
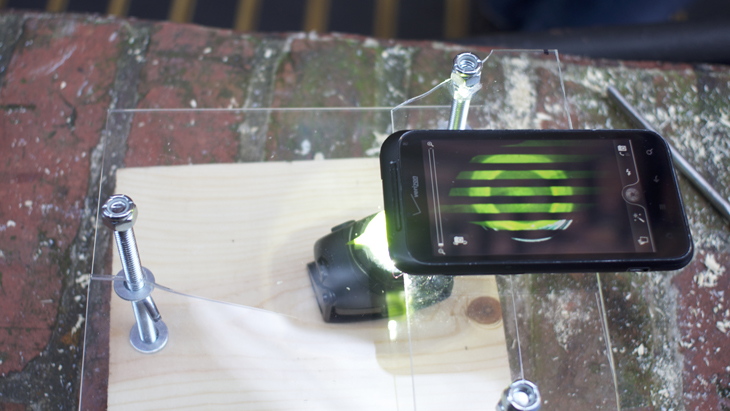 |
While the strobe was cool, it wasn’t helpful for backlighting samples. With a little trial and error, we got a new solution. We used two phones, one below the sample with the flashlight function on, and one to take the picture.
 |
We did get a couple of magnified pictures, but nothing near the beautiful images that Yoshino gets.
In the end, I was sad. It didn’t work out like I hoped, and my microscope didn’t look anything like the one in the picture. I got really frustrated, we all worked hard, and my improvisation screwed things up.
But this is where the scientist in me comes in. Sure, I messed up. I bought the wrong stuff, and sometimes I couldn’t find the right stuff at all. I broke things and missed instructions.
And in the process, I learned a lot. I learned how I went wrong, and I asked for help. Next time I’ll embed the lens right. Heck, next time I’ll test the light before I buy it! I even came up with useful things to help make the project easier. When drilling through Plexiglas, use masking tape to protect it, and start with a small drill bit. Using a drill press would be really ideal to make sure I can control the speed of the drill. I’ll make sure I don’t accidentally buy the nuts that go on irreversibly.
Finding out these little improvements is part of what doing science is all about. I also talked with Yoshino about how to improve my product. He gave me some great advice and helped me troubleshoot. He may even include some of my own “hacks,” like the masking tape trick, in his update to the instructions.
Now I am armed and ready with my new knowledge. And instead of calling it off, I’m going to try again. I’m going to get new materials, and I’m going to make it better. Make sure to tune in next time, when I will talk with Yoshino about why he invented the DIY microscope, how he did it, and what other inventions he’s got lying around!
Power Words
lens (in physics) A transparent material that can either focus or spread out parallel rays of light as they pass through it.
light emitting diodes (LEDs) Electronic components that, as their name suggests, emit light when electricity flows through them. LEDs are very energy-efficient and often can be very bright. They have lately been replacing conventional lights in auto taillights and in some bulbs used for home lighting.
microscope An instrument used to see objects and details too small to see with the eyes alone.
Plexiglas The chemical Poly(methyl methacrylate), a transparent plastic that can resist shattering. It can be used instead of glass.
post-baccalaureate fellow A position working at a university, often in a lab, for people who have just graduated college.